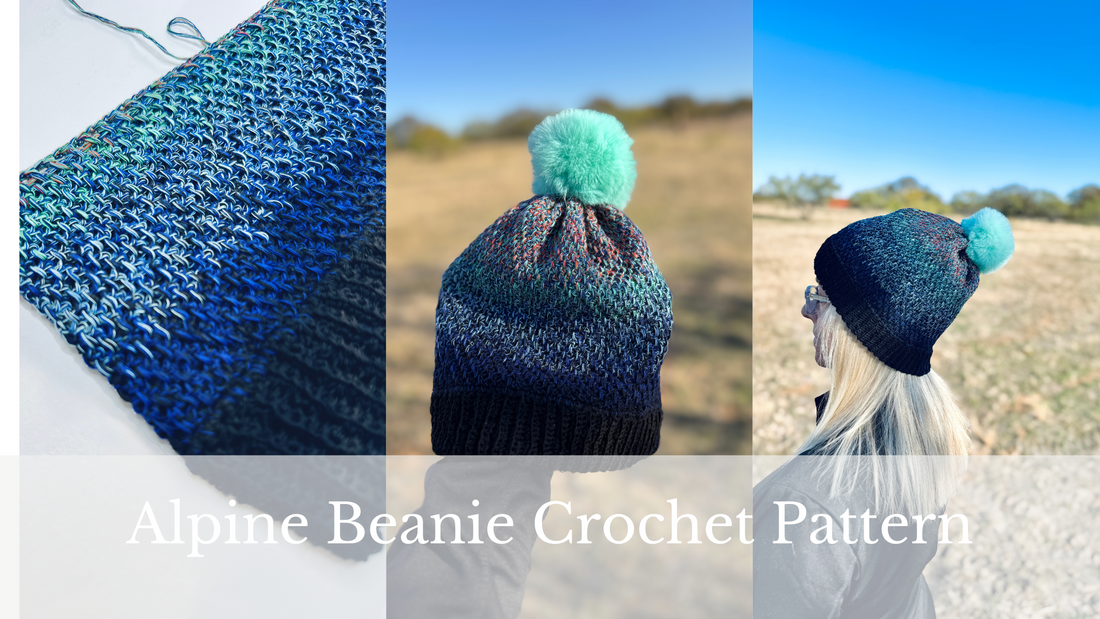
Alpine Beanie Crochet Pattern
Are you ready to free your crochet creativity? Whether you're a pro or a beginner just starting out, there's always something new to learn in the world of crochet. And today, I have a special treat for you. Hi there, I’m Angie, the crochet pattern designer behind SASS Crochet, and I'm here to share a brand new pattern with you. This project has been a collaboration with Rena, the creator of this luxurious cotton yarn I used for this new beanie.
I absolutely love designing beanies but since I live in Texas, I know all too well that our weather doesn't always call for a thick, bulky beanie. So in my opinion you should still be able to rock a stylish and functional beanie without feeling like your head is suffocating. That's where my passion for designing this lightweight beanie comes in. And with the help of my friend and yarn artisan, Rena, we've created the ultimate beanie using fingering weight yarn.


ALPINE BEANIE
Designed by SASS Crochet | Angie Dooley
This pattern is free to view here on the blog or, if you prefer the premium ad-free version of the Alpine Beanie crochet pattern, you can get it for a small cost in my Etsy or Ravelry shops.
In the premium version, you will receive a beautifully formatted, easy-to-read PDF written pattern. Also included are multiple photos to help you make your own beanie.
SKILL LEVEL: Advanced beginner
HERE'S WHAT YOU WILL NEED:
- Fingering, (#1) yarn. (Designed with Rena’s Thread & Crafts in the Celestial Opal Remix colorway.)
- 325 yds
- 2.50 mm hook
- Yarn needle
- Scissors
STITCH KEY:
BLO = Back Loop Only
ch = chain
dec = decrease
dc = double crochet
join = Invisible Join Method
rep = repeat
Rnd(s) = Round(s)
sc = single crochet
sk = skip
slst = slip stitch
st = stitch
GAUGE: Brim - 8 sc x 6.6 Rows = 1"; Body - 13 dc x Rnds 1-12 = 2".
FINISHED SIZE = When laid flat, 9" across × 9" tall after cinching closed.
NOTES:
• Written in US crochet terms.
• Chain stitch at the beginning of Rnd does not count as a stitch.
• When working 2 Rnds below you will crochet over the ch and into the st 2 Rnds below.
PATTERN INSTRUCTIONS
BRIM:
Ch 27.
Row 1: sc in 2nd ch from hook and each remaining ch, ch 1, turn. (26 sc)
Row 2: sc, sc BLO next 24, sc, ch 1, turn.
Rows 3 - 113: rep Row 2.
Do not finish off. Bring short ends together with Row 1 in back. Slst ends together working across beginning ch and Row 113. Ch 1, turn right side out, seam is now on the inside. (26 slst)

Brim should measure: 3.25" x 17”.
BODY:
To make double brim, fold brim in half making sure seam is on the inside.

Rnd 1: sc in each Row end of both sides of ribbing, join to 1st sc. (113 sc)
Rnd 2: ch 1, sc in 1st st, *ch 1, sk st, sc; rep from * around, join to 1st sc. (57 sc, 56 ch sp)
Rnd 3: ch 1, sc in 1st st, dc in sk st on Rnd 1, *ch 1, sk next st, dc in sk st on Rnd 1; rep from * around, sc in last st, join to 1st sc. (2 sc, 56 dc, 55 ch sp)

Rnd 4: ch 1, sc in 1st st, ch 1, sk next st, dc in sk st 2 Rnds below (on Rnd 2), *ch 1, sk next st, dc in sk st 2 Rnds below (on Rnd 2); rep from * around, ch 1, sk st, sc in last st, join to 1st sc. (2 sc, 55 dc, 56 ch sp) See photo 8.
Rnd 5: ch 1, sc in 1st st, dc in sk st 2 Rnds below, *ch 1, sk next st, dc in sk st 2 Rnds below; rep from * around, sc in last st, join to 1st sc. (2 sc, 56 dc, 55 ch sp)
Rnd 6: ch 1, sc in 1st st, ch 1, sk next st, dc in sk st 2 Rnds below, *ch 1, sk next st, dc in sk st 2 Rnds below; rep from * around, ch 1, sk st, sc in last st, join to 1st sc. (2 sc, 55 dc, 56 ch sp)
Rnd 7: ch 1, sc in 1st st, dc in 1st sk st 2 Rnds below, *ch 1, sk next st, dc in sk st 2 Rnds below; rep from * around, sc in last st, join to 1st sc. (2 sc, 56 dc, 55 ch sp)
Rnds 8 - 39: rep Rnds 6 - 7. Should measure 8.25” when finished.
Rnd 40: sc in next 2 st, dc in sk st 2 Rnds below, *sc in next dc, dc in sk st 2 Rnds below; rep from * around, sc in last 2 sts, join to 1st sc. (58 sc, 55 dc)
Rnd 41: ch 1, *dec, sc in next 4; rep from * around, sc in last 5 sts, join to 1st sc. (95 sc)
Finish off leaving a 10” tail. Turn the beanie inside out. Weave the tail in and out of the stitches on Rnd 41, then cinch closed and secure. Turn right side out and add a pom if you would like!
I can’t wait to see your Alpine Beanies! Please tag me @angied_sass and use these hashtags to share: #sassysshoppe, #AlpineBeanie
Stay tuned!! There's an entire Alpine collection coming.
Be sure to visit my blog for more crochet fun!! www.sassyspecialtyshoppe
